As a writer, I depend on my editors to give me feedback, help me grow as a writer, and ultimately craft first drafts into decent, publishable content. But even just pumping out that first draft takes a whole lot of time, research, and the occasional headache.
Fortunately, folks at Zapier are pretty crafty. One of my favorite things they created recently? The ability to create custom AI-powered chatbots using
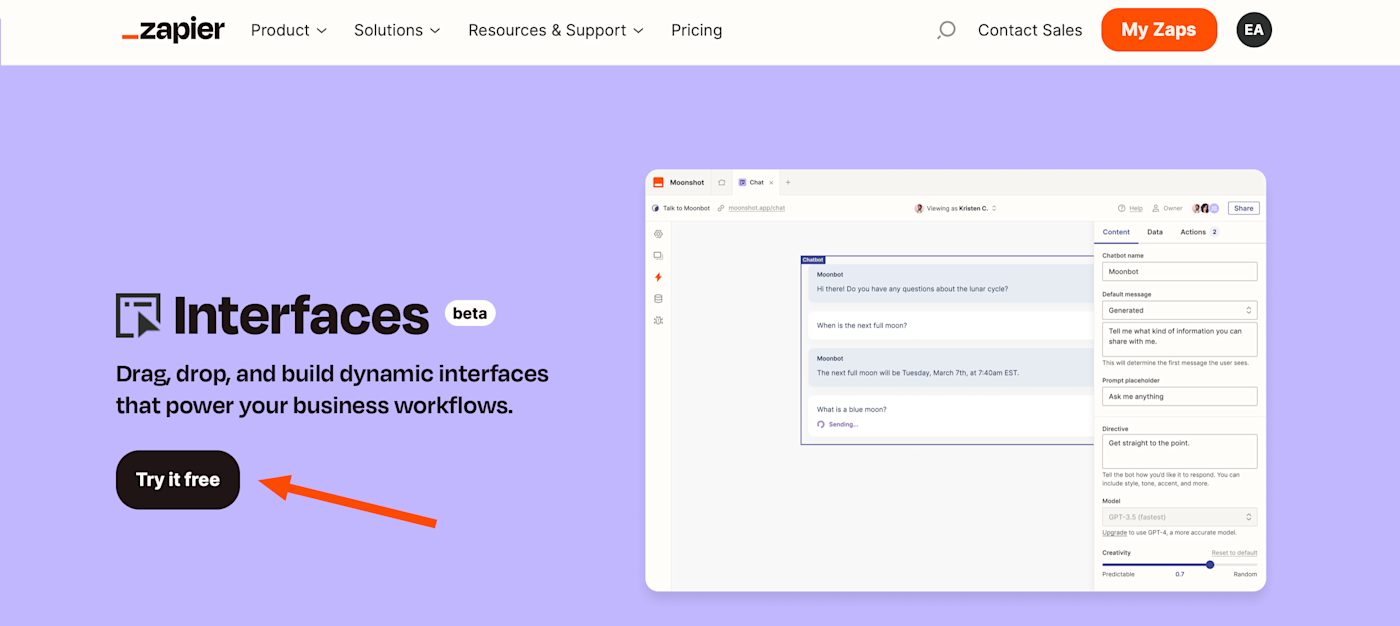
Zapier Interfaces.Zapier Interfaces gives you the ability to create custom web pages and apps that can also pull in the power of GPT-4 via a chatbot component. This meant that I (with zero coding skills) was able to create a customized chatbot that helps me edit my content for conciseness, adjust it to Zapier's tone of voice, and even pinpoint where I'm going wrong. And that's all before it goes to my (human) editor.
But it's not reserved for writers. Many teams at Zapier have already created specific-purpose chatbots that give career advice, translate corporate jargon into plain English, suggest gift ideas, and finesse feedback for employees.
In this blog post, I'll walk you through exactly how to create your own chatbot using Interfaces—and offer a few ideas on specific use cases.
How to create a chatbot
Here's the quick version of how to create a chatbot with Zapier Interfaces, though we'll go into more detail down below:
-
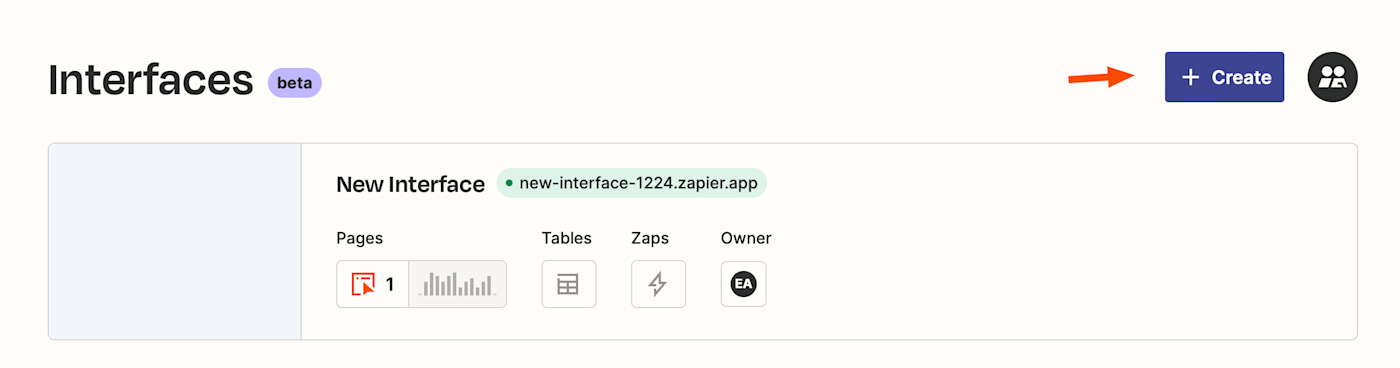
Go to the Interfaces dashboard
-
Click +Create
-
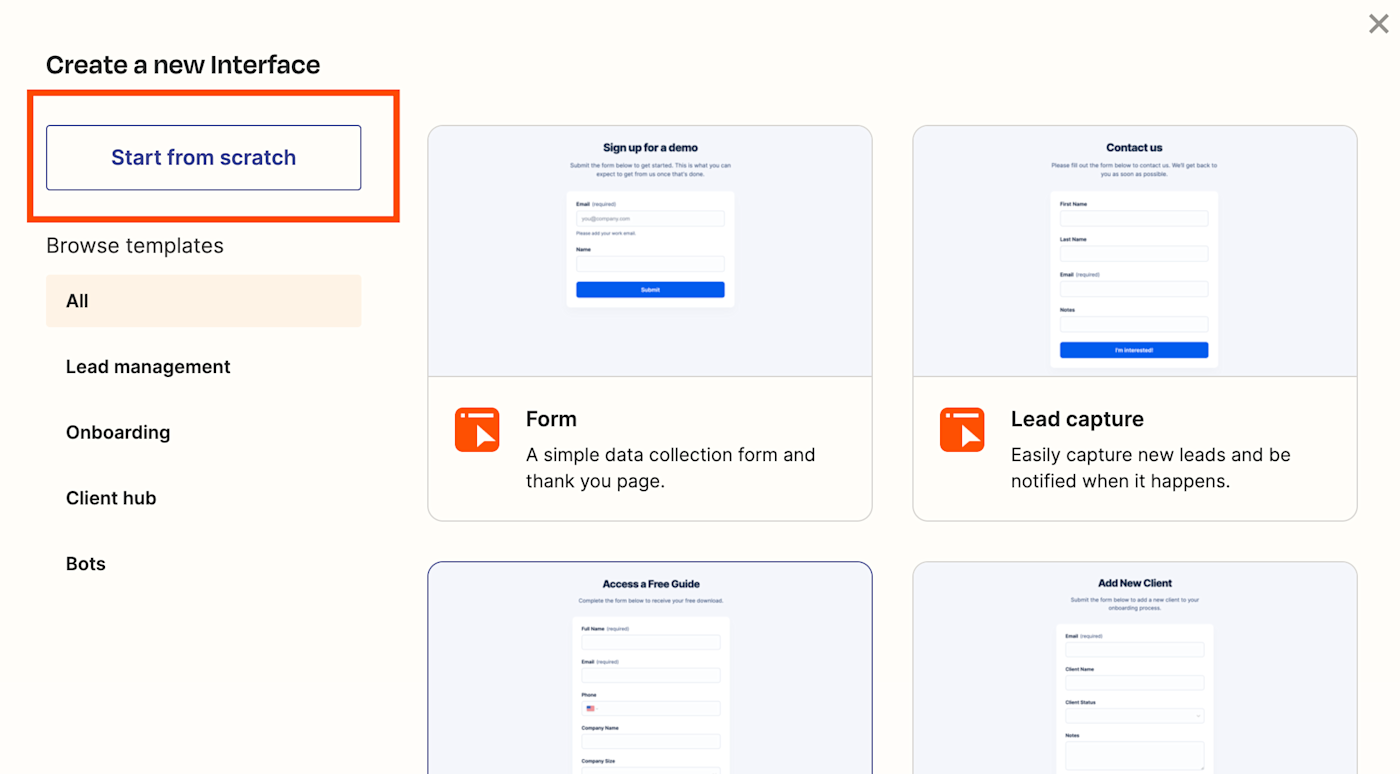
Click Start from scratch
-
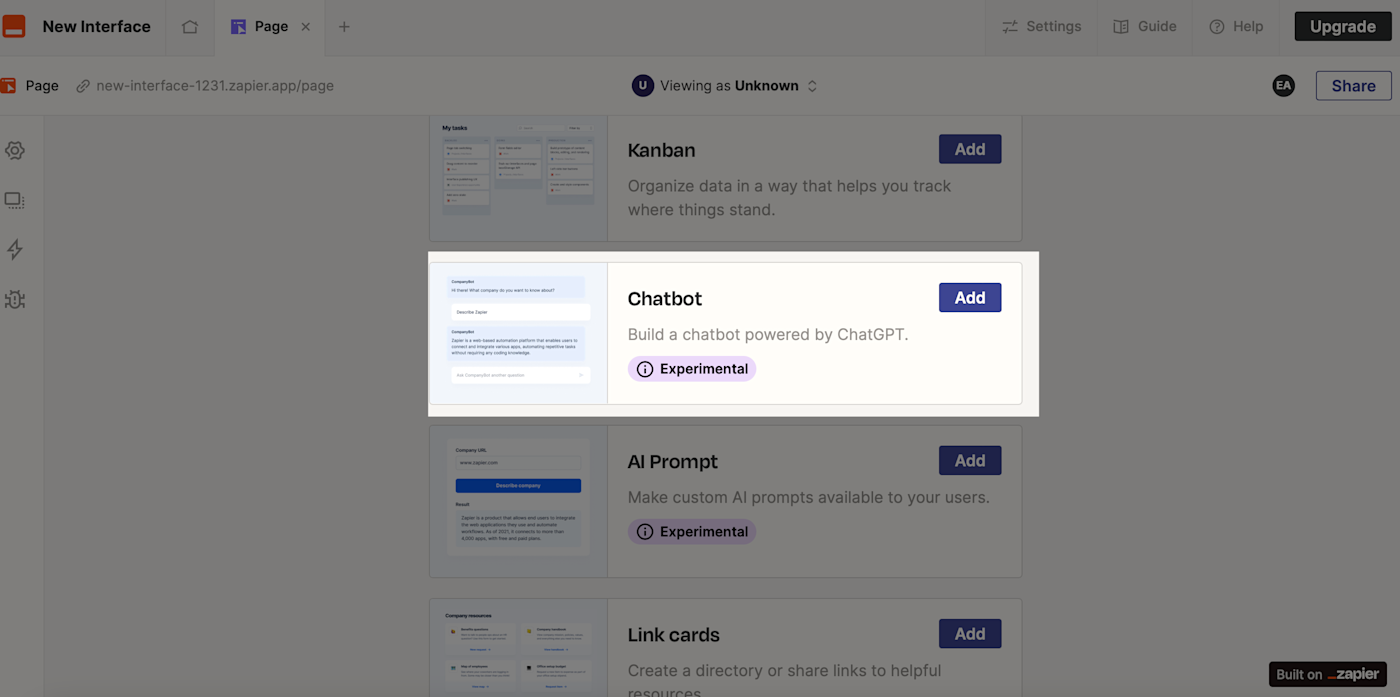
Scroll down and click on Chatbot
-
Add it to your dashboard
-
Customize your chatbot's settings
New to Zapier? It's a tool that helps anyone connect apps and automate workflows—without any complicated code. Sign up for free.
Before you begin
Make sure you have a Zapier account. You'll also need to sign up for Interfaces, which is currently in beta. You can sign up for free access here.
For the purpose of this tutorial, we'll be using Interfaces Premium, which allows you to pull in OpenAI's GPT-4. If you're using the free version of Interfaces, you'll be limited to GPT-3.5.
If you want to upgrade to Premium, first sign up for the free account, then head over to your Interfaces dashboard and click Upgrade.

Step 1: Build your chatbot
Let's start off with creating a chatbot from scratch. Head over to your interfaces dashboard. On the top-right corner of your screen, click +Create.
Once you've done that, you'll see multiple templates you can choose from. In this instance, we don't need a template, so in the top left-hand corner, click Start from scratch.
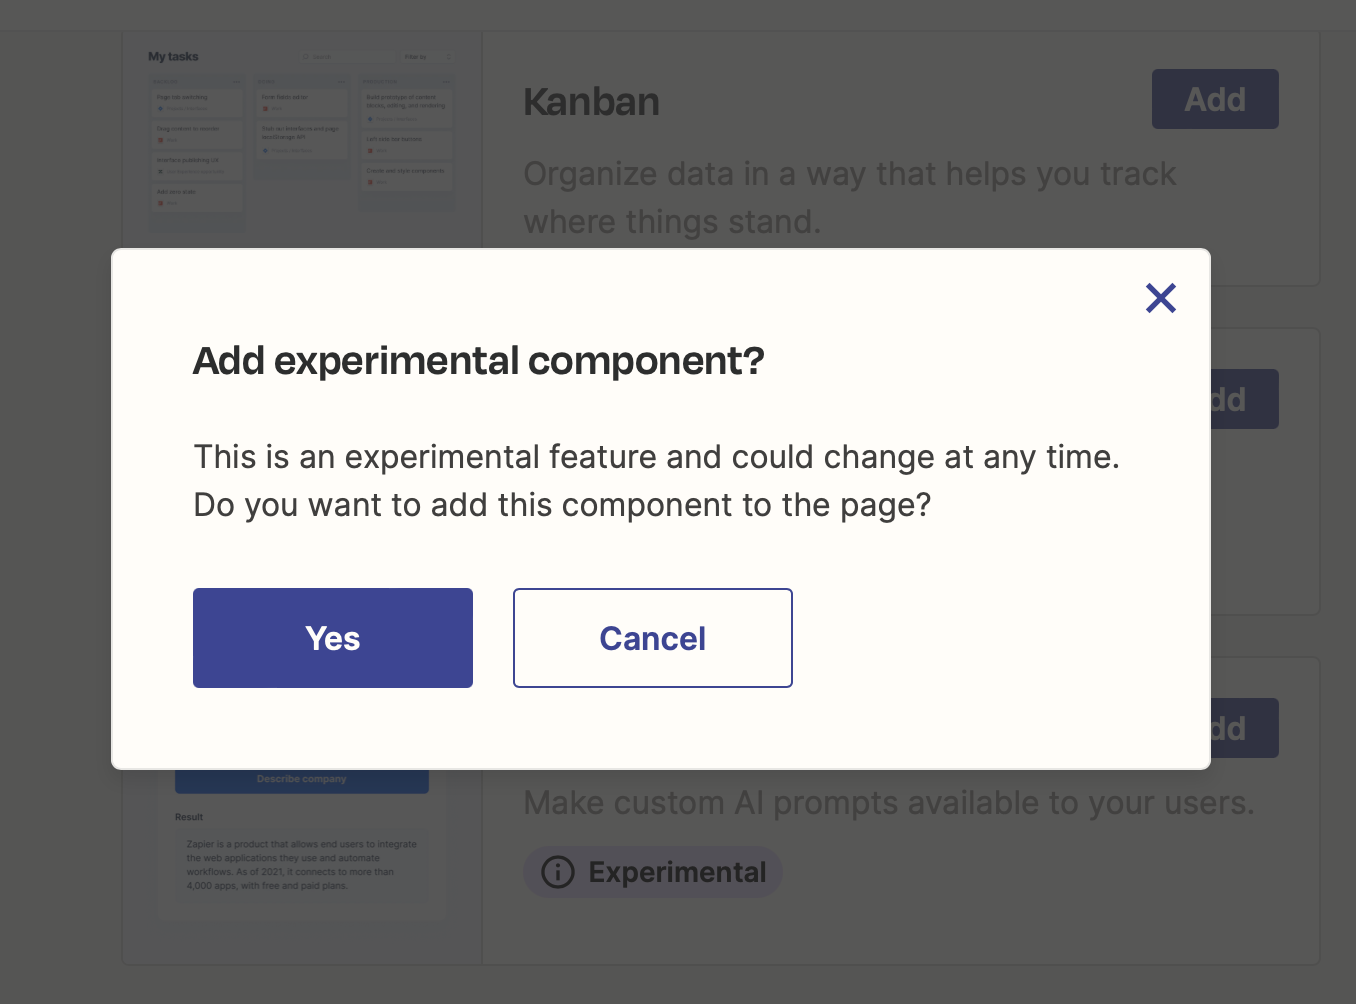
Add your chatbot component
Once your interface has loaded, you'll see a list of different options. Scroll down and click Add in the Chatbot block.
Next up, click Yes on the following modal.
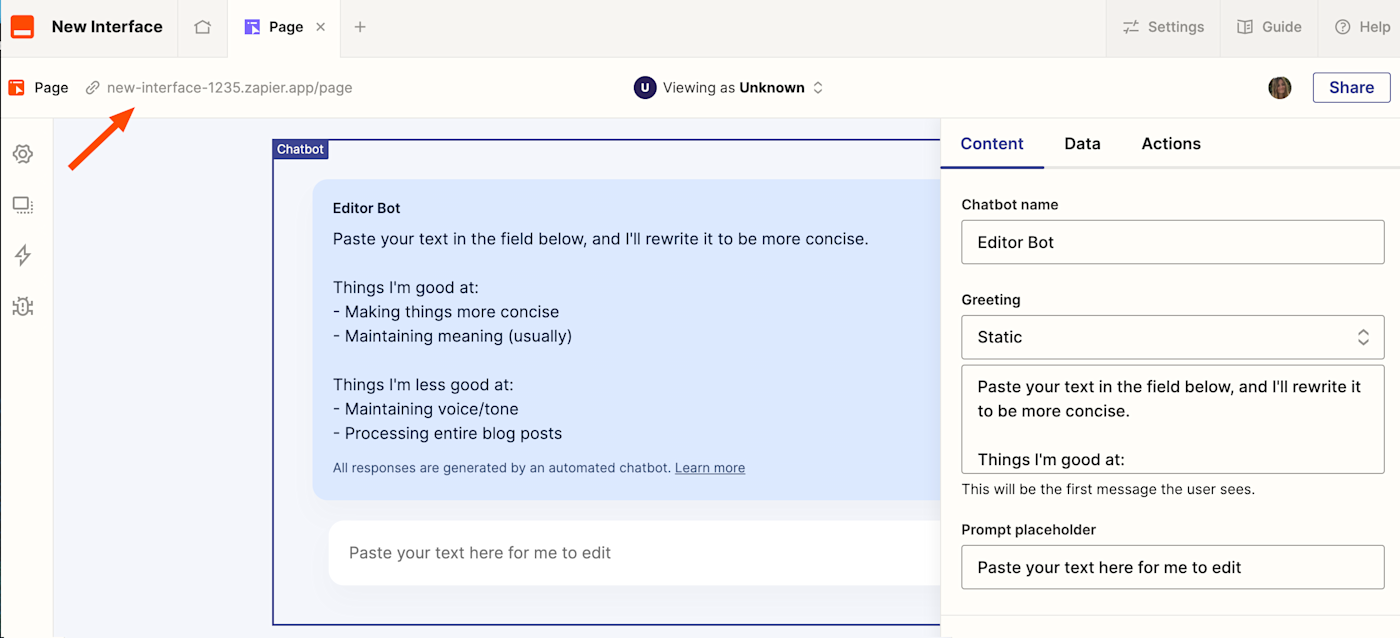
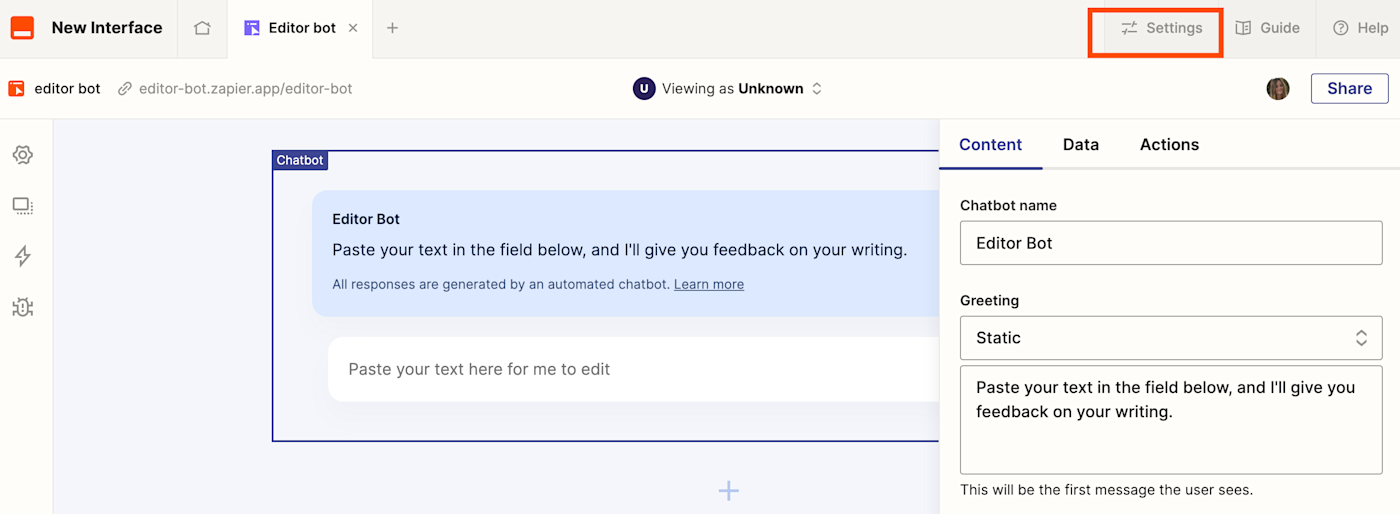
Name your chatbot
Once you've added the chatbot component, you'll be brought to the backend of your chatbot interface, where you can set up the parameters and customize the directions for your chatbot. Here's what that will look like:
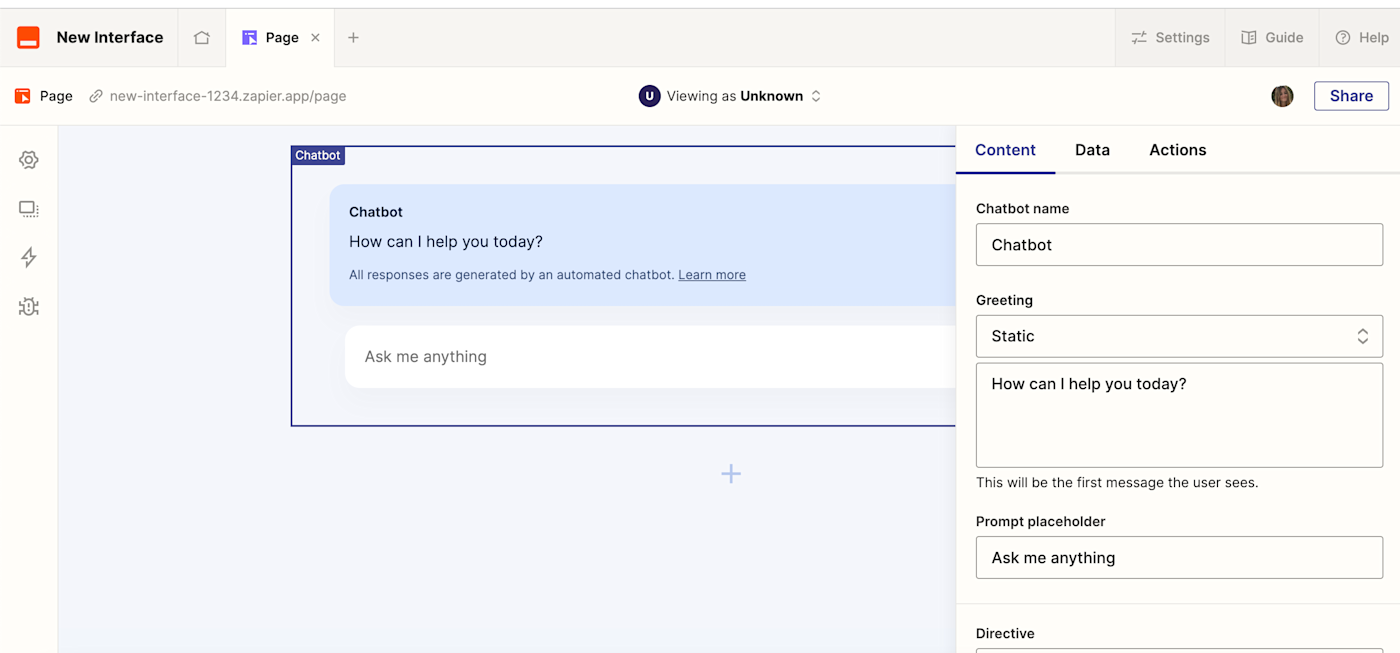
The panel on the right is where you can set up the instructions.
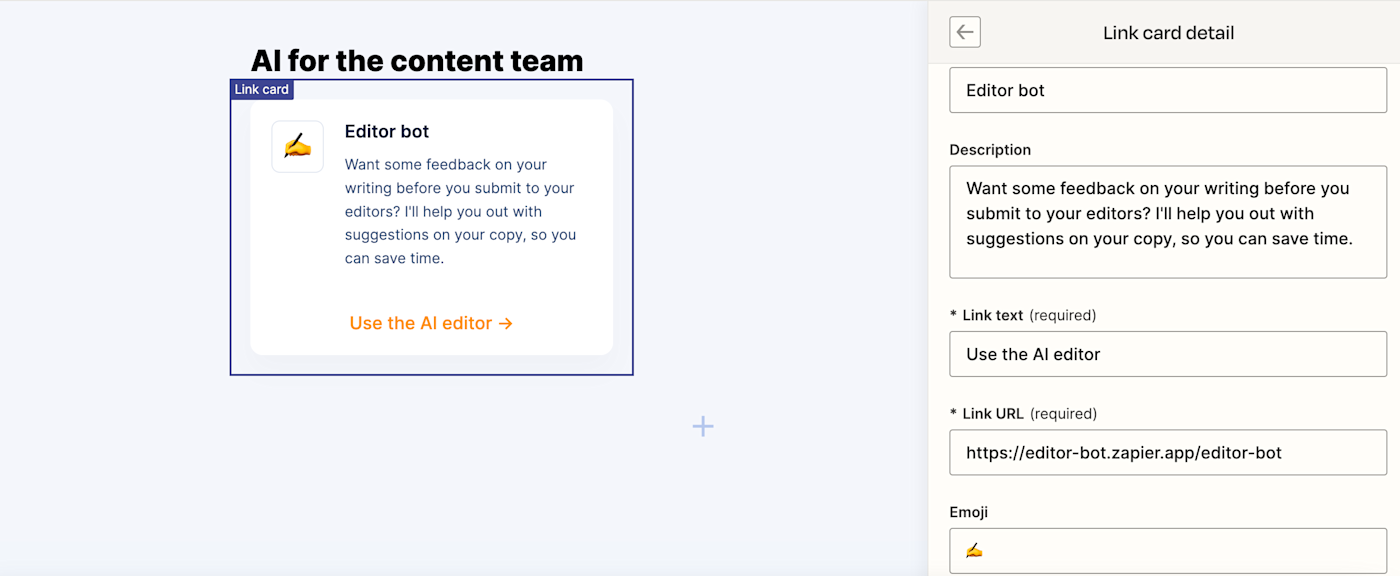
Under Chatbot name, add the personalized name you want to give your bot. In this case, I'm calling mine the Editor Bot, but obviously this will depend on your use case.
Add a greeting
The text inside the first blue box is what your chatbot will say when your users first interact with it (the chatbot's greeting), and the second white box is the prompt placeholder. This is the instructional copy so your users know where—or what—to ask the bot.
In the Greeting field dropdown, select Static or Generative. Static means the bot's greeting will always remain the same, whereas generative will change the chatbot's greeting every time it's opened.

Write your directive
The most important part of your chatbot is the directive, as this will dictate the chatbot's use case. These instructions will teach it to respond to users in a tailored way.
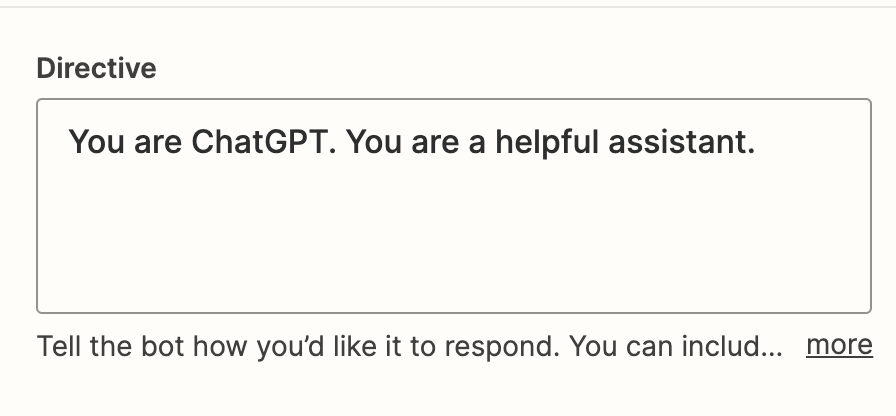
Because this is like the "prompt" you'd give ChatGPT as a user, it's important to remember that the more detailed and clear your instructions are, the better the chatbot will respond.
For our editor bot, we'll include detailed directions on style, tone, grammar preferences, word count, and Zapier's blog voice. You can also pepper in examples of the kind of writing you want it to emulate.
For better results, you should specify things like the chatbot's role: "You are a very skilled editor [X, Y. Z]"
But you can also add other directives, like: "You know when to dole out the wit and when to be informative. You strike the perfect balance between persuasion and education."
And then finally, you might add what the chatbot's goal is, such as: "Your task: Read the content and respond with honest and direct feedback about what could be improved based on the above list. Be specific, and include examples of what should be revised and some suggestions for how to revise. Consider each sentence of the content and offer feedback anywhere it’s needed."
I recommend writing out the directive on a separate document first, so you can go back and tweak things as you see fit. Once you're happy with your directive, copy and paste it into the Directive field.
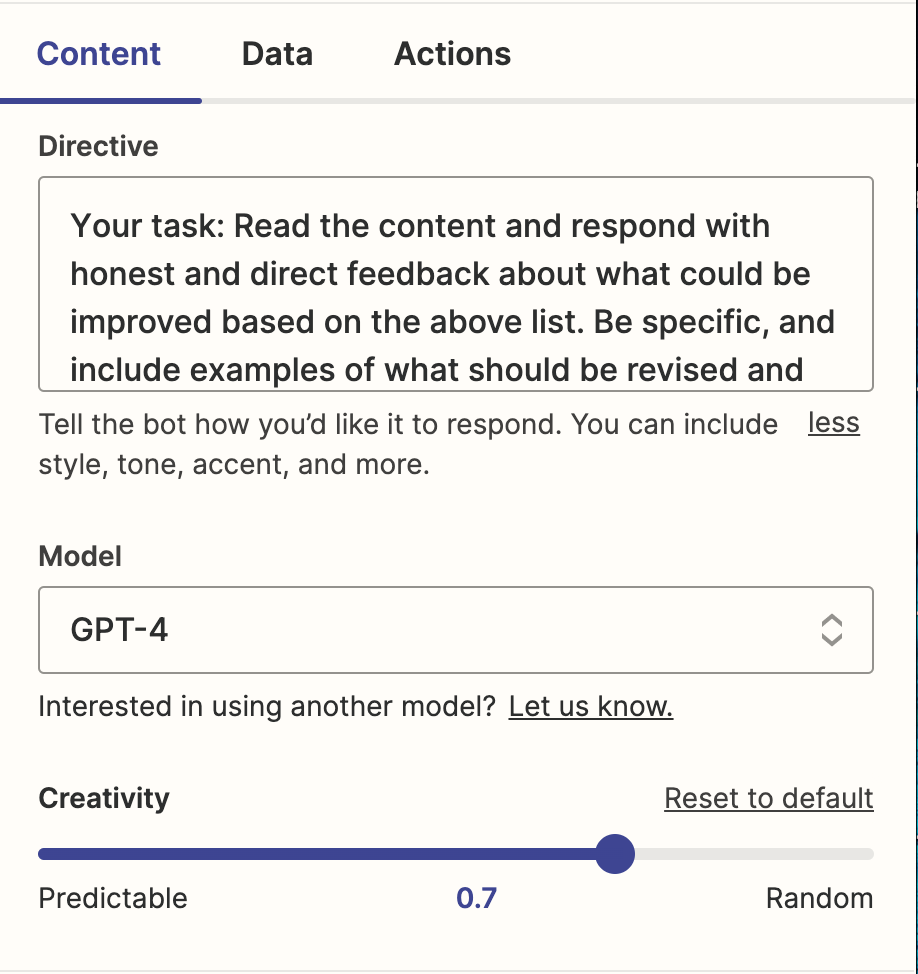
In the model dropdown field, you can click on GPT-3.5 or GPT-4, depending on your Interfaces plan. You can also adjust things like the creativity levels (default is 0.7), width, and alignment.
Test your chatbot
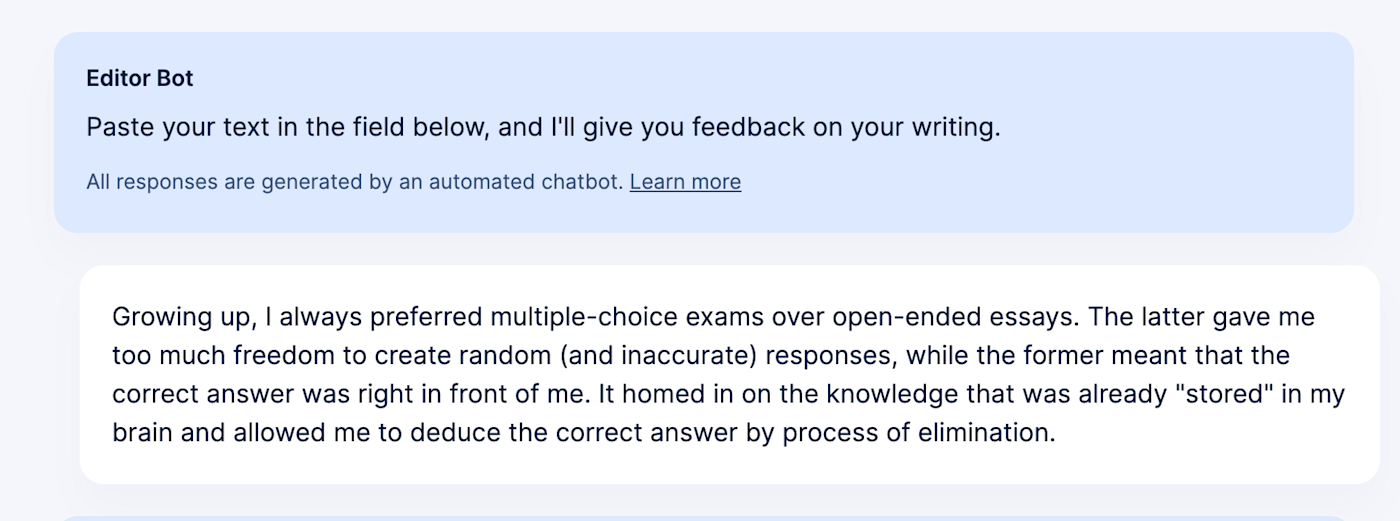
Next, it's time to test your chatbot. Click on the link in the top left-hand corner of your page. You'll be taken to the end user interface, where you can type in your text—and start testing out its editing capabilities.
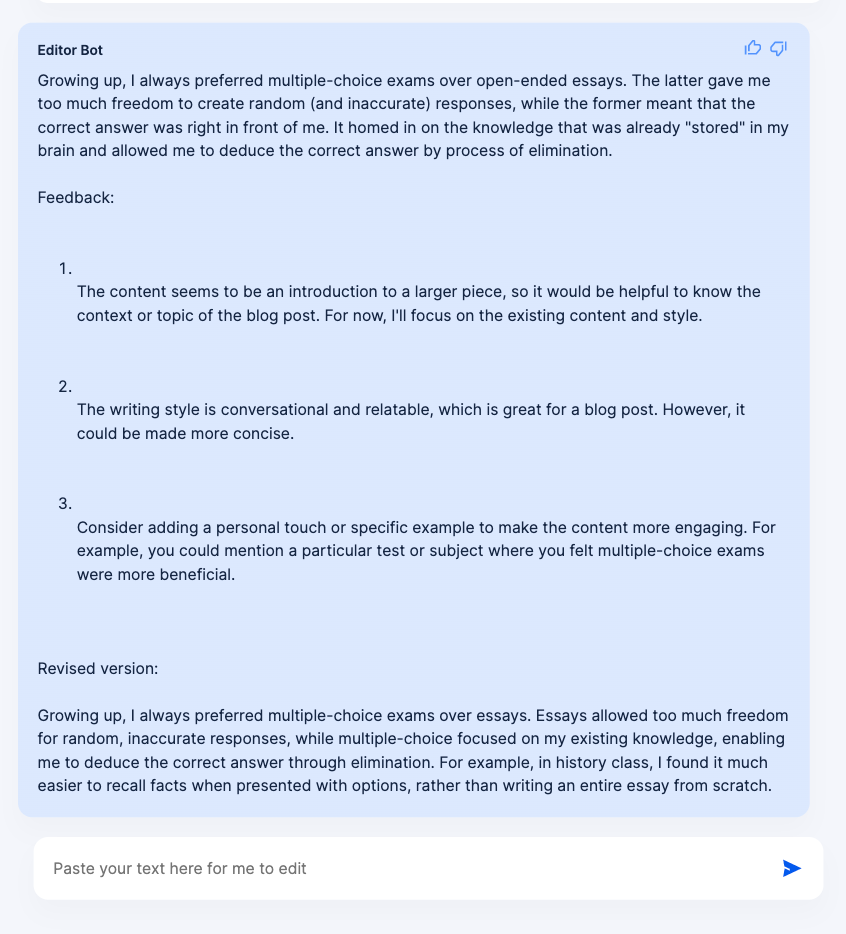
For example, I added in a paragraph of my own writing from another article to see its response:
In return, my editor bot gave me a full dose of feedback, telling me I could make the writing more concise, add personal touches, and include specific examples to illustrate my point. It even provided me with a revised version, which I can then use to adapt my writing.
If you're not happy with the results, you can do two things:
1. Play with the temperature (creativity setting)
Before you start reworking your directive to get better results, you should first try playing around with the creativity temperature. This can help adjust the output you're getting. For example, a lower temperature (below 0.7) will churn out more predictable and "generalistic" results than a higher setting. In turn, if you dial up the setting, you could get more creative and "human-sounding" results. It'll depend on what you're after, so play around with it.
2. Tweak the directive
If you've still not gotten the results you're after by adjusting the creativity levels, there may be something missing or too vague in your prompt. Just go back to your directive and tweak the instructions. Remember, the chatbot isn't all-knowing, so it may need clearer instructions.
Adjust your settings
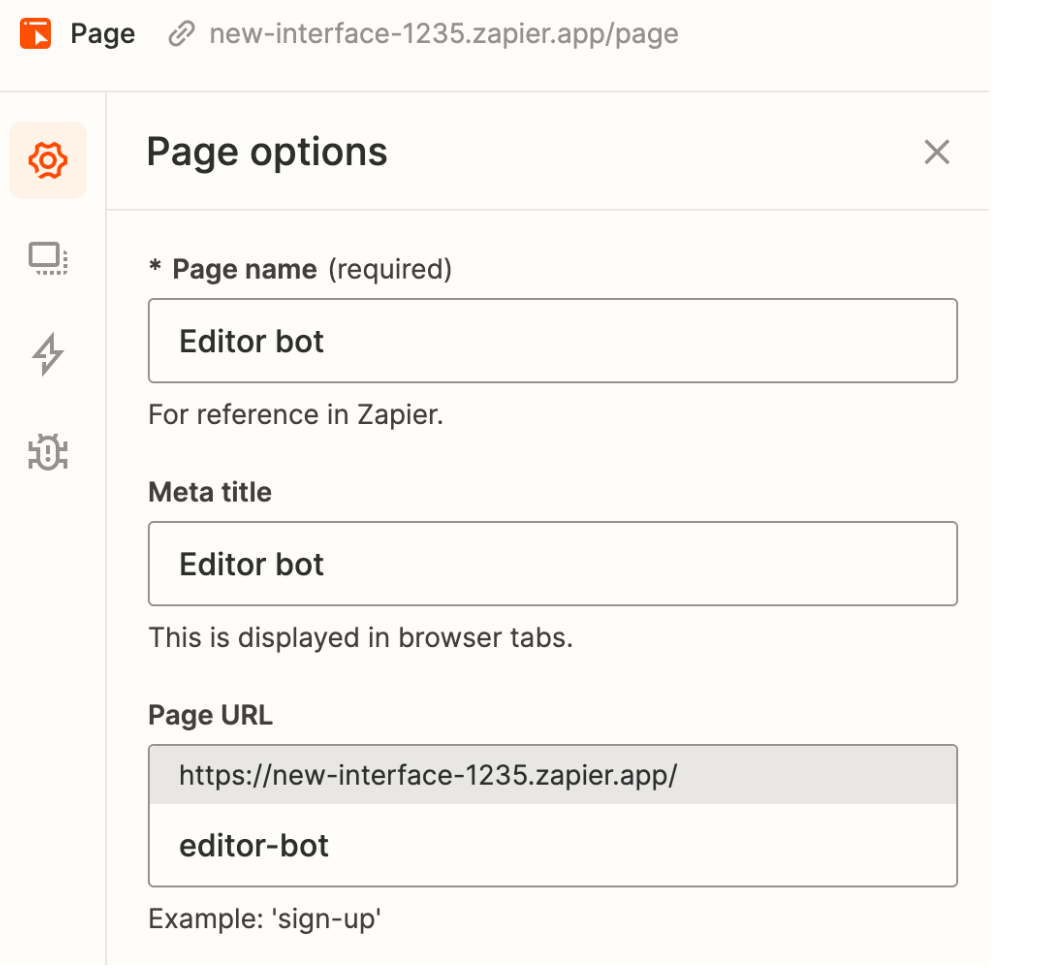
Once you're happy with your bot's performance, go back to your interface page and click on the settings icon in the left-hand panel. Here you can adjust your page options and personalize the page name, meta title, and URL for your bot.
For more advanced settings, click Settings in the top right corner of your page.
Here you can do everything from editing the subdomain of your bot and changing the appearance (colors and branding), to adding a logo, custom domain, and tracking. You can also restrict access to anyone with the link or a password, or to managed users only.

Once you're happy with the results, remember to save any changes where necessary. You can always go back and edit it later, but your bot is now ready to share!
Step 2: Build a landing page for multiple chatbots
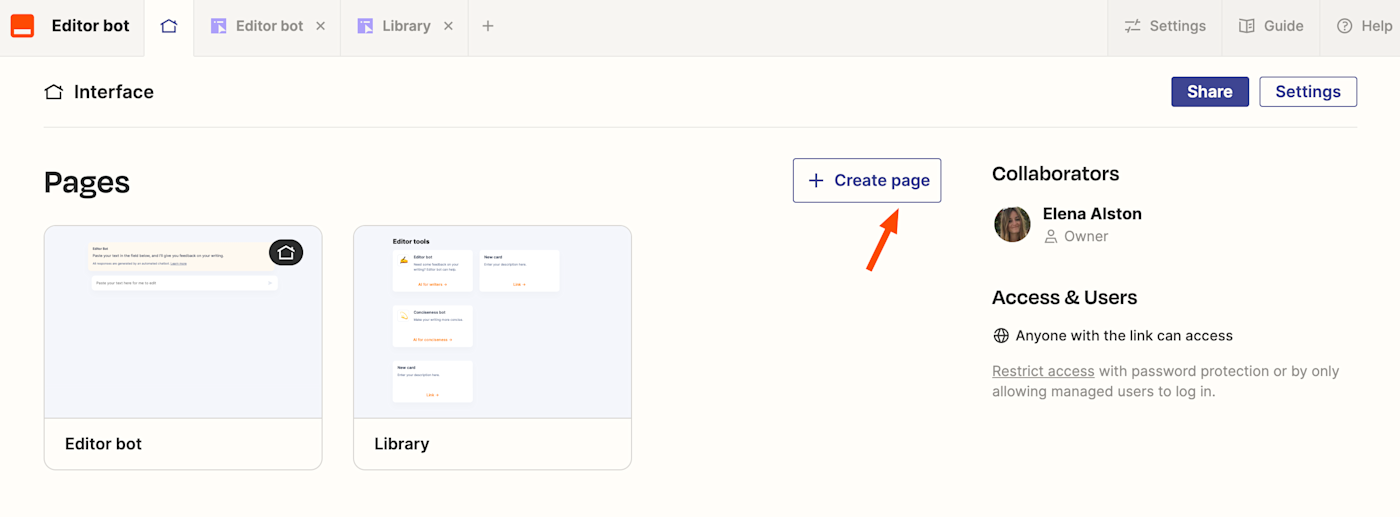
Once you've built a few chatbots, you should think about presenting them together in a nice layout for users or coworkers to browse.
For example, here's a quick library I built so folks could easily access my different bots:

Create and name a new page
To set this up yourself, go to the Interfaces dashboard and click Create page.
Name your new page. In my case, I'll go with something simple, like "AI for the content team."
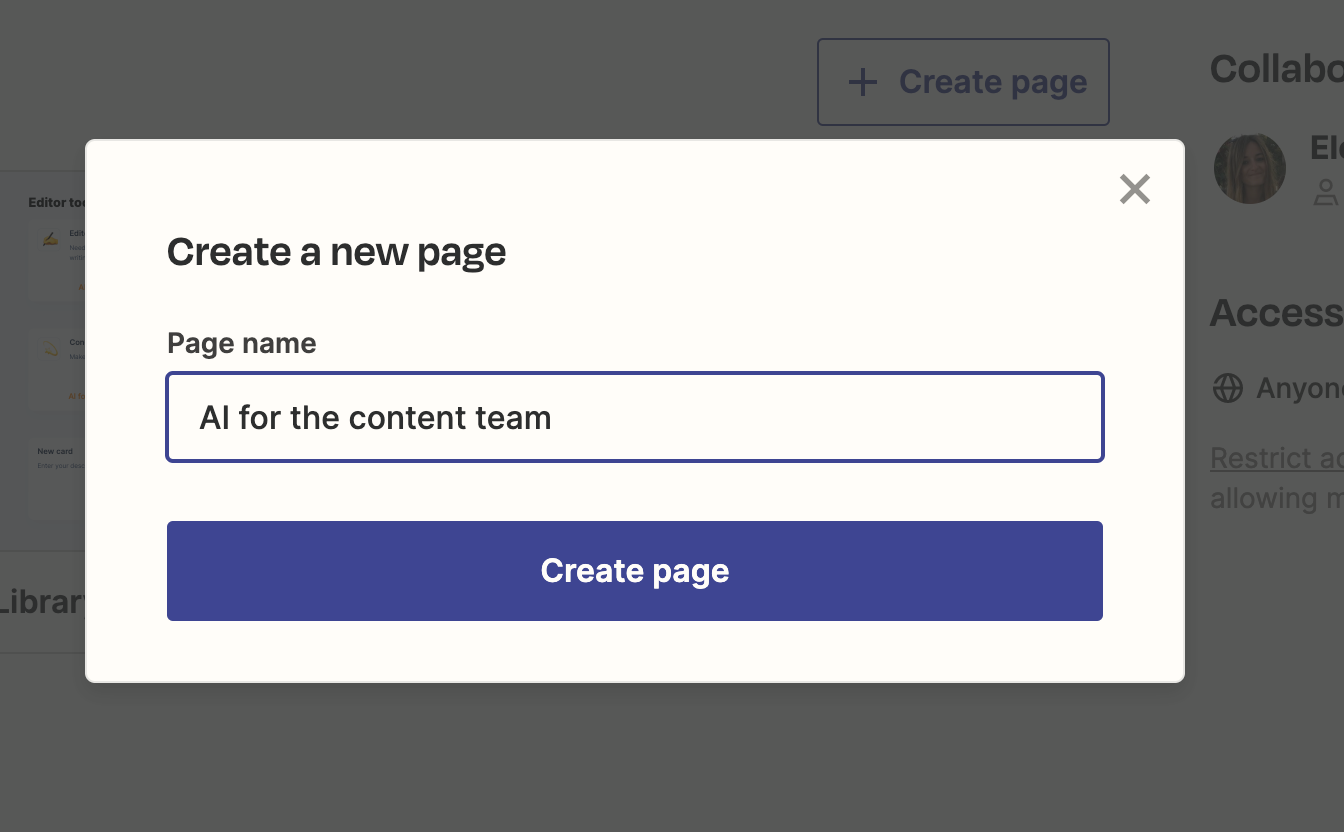
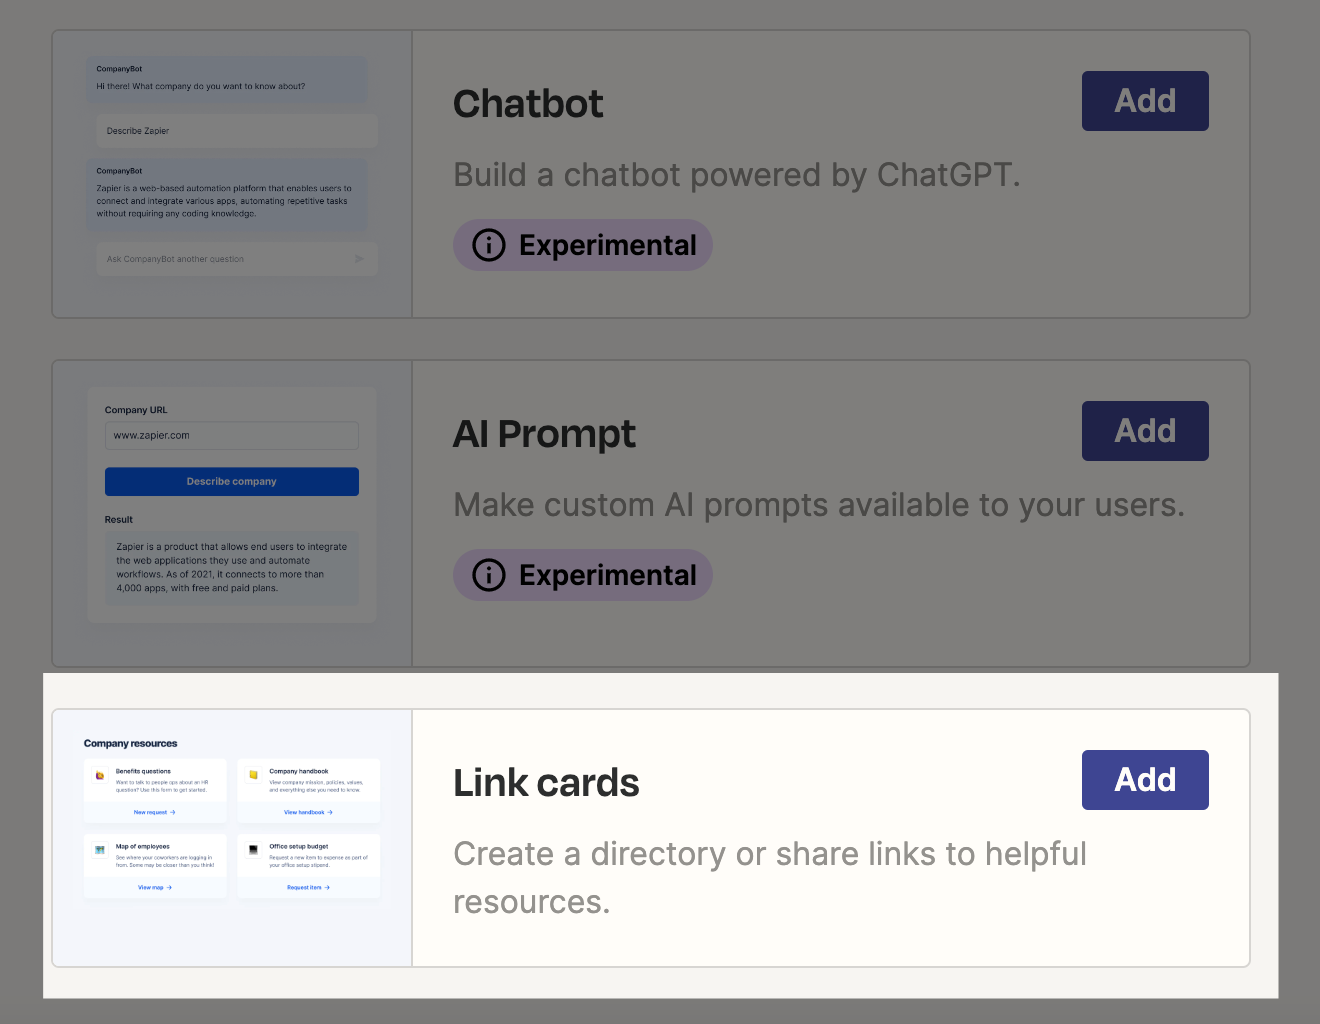
Click Create page when you're done. Next, scroll down the list of options and click Link cards.
Add the header for your landing page
Add a name for your header. In this instance, I'm calling mine "AI for the content team" so it matches the page name.
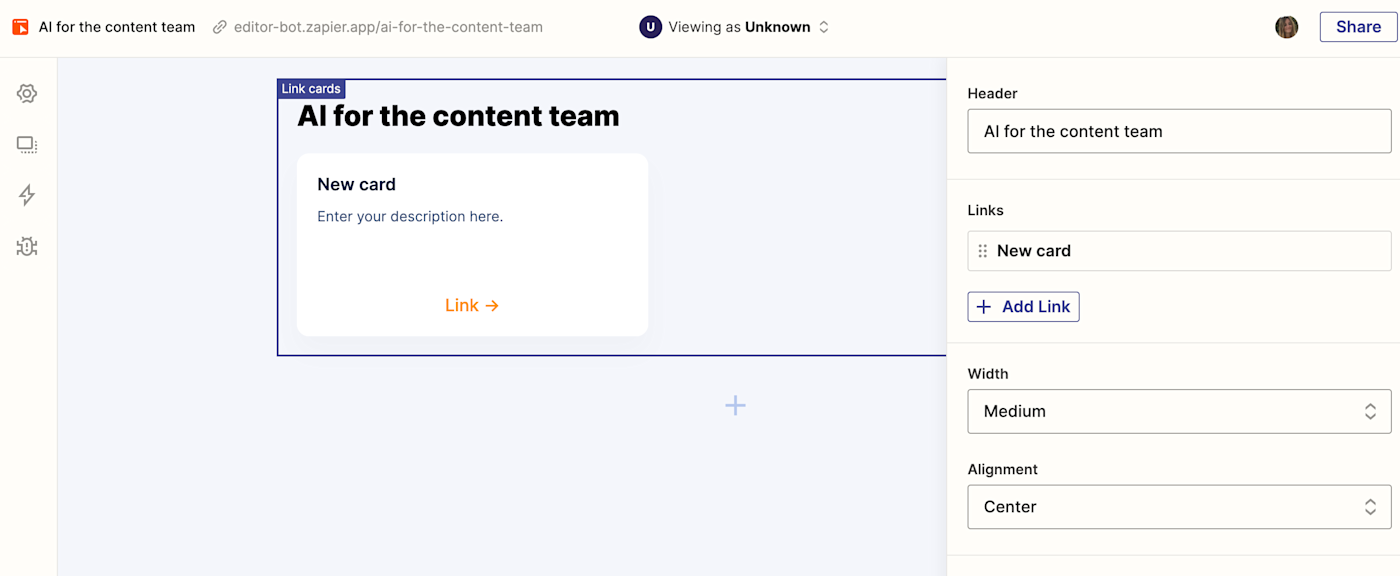
Add different tiles
Once you're done, click New card in the right hand corner. You can now fill out all the details that will appear on each card, or "tile," for your library. Don't forget to insert the link to each of your bots under Link URL. Remember the bot I created earlier? That's the link I'll be adding in.
Once you're finished, click Done. You'll be brought back to the library layout, where you can keep adding tiles for all the bots you've created by clicking Add Link, here:
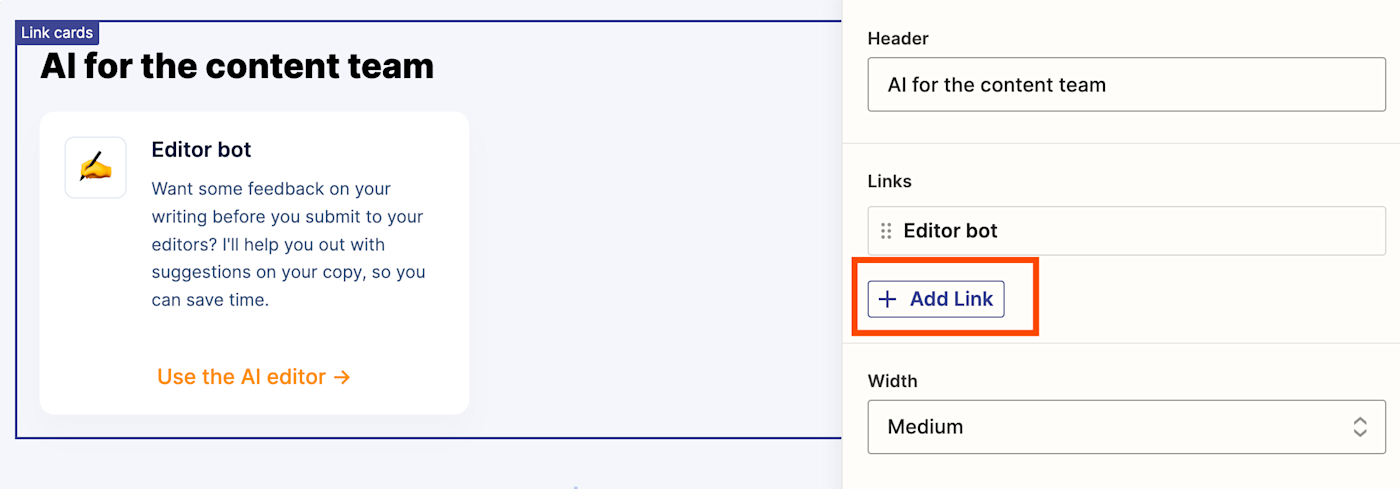
Repeat the same process until you've added all of your link cards (bots) to your library. Once you're done, you can check out the link and share with your entire team.
Chatbot inspiration
Not sure how you'd use a chatbot? At Zapier, different teams have already created a ton of bots for different purposes. Here's a bit of inspiration to get you started:
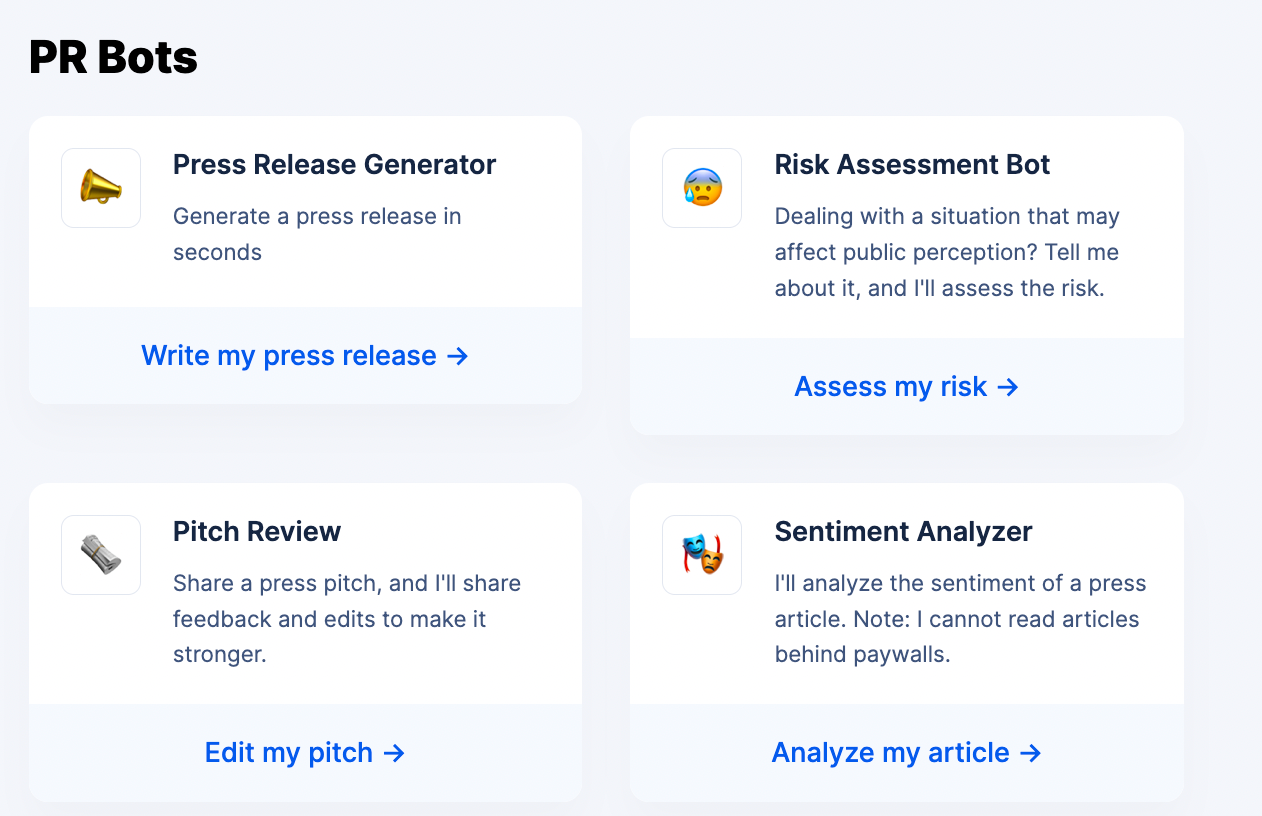
PR
If you work in PR, you could create a bot that helps you generate a press release, for example. Or, you could set up a sentiment analyzer that can indicate the tone of a press article in seconds:
Content
The editorial team at Zapier created a bunch of bots to help writers improve specific areas of their writing:

Team communication
Struggle to put positive feedback—or difficult conversations—into words? You could create a series of bots that help you and your team formulate professional feedback:

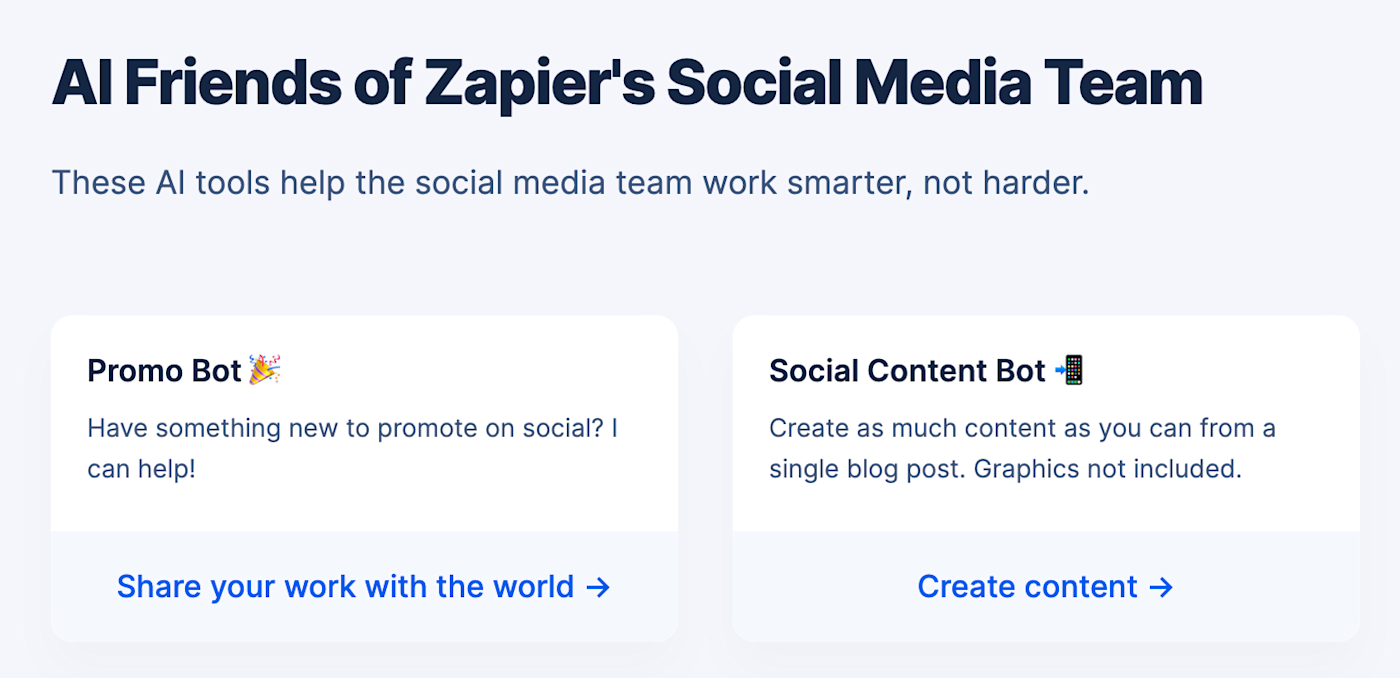
Social media
From social promotions to finding the right influencers for a campaign, you can create social media bots that take the hassle right out of the hussle:
Marketing
Have clients or coworkers who tend to speak a lot of corporate jargon? Creating a simple chatbot that can translate lingo can clear up any ambiguity.
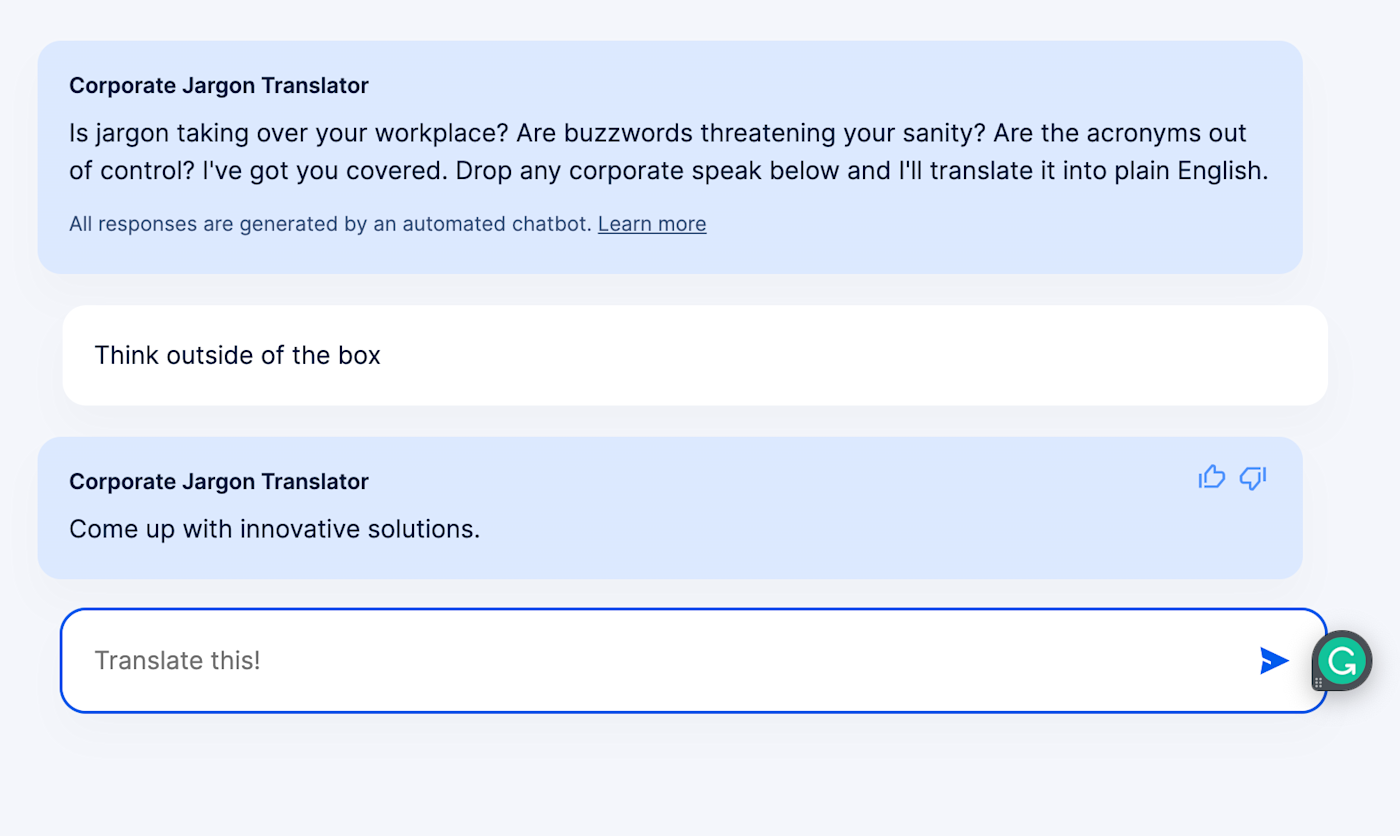
You could also create bots that help you with legalese, cultural context, or specific buzzwords. These are just a few examples of what you could create, though.
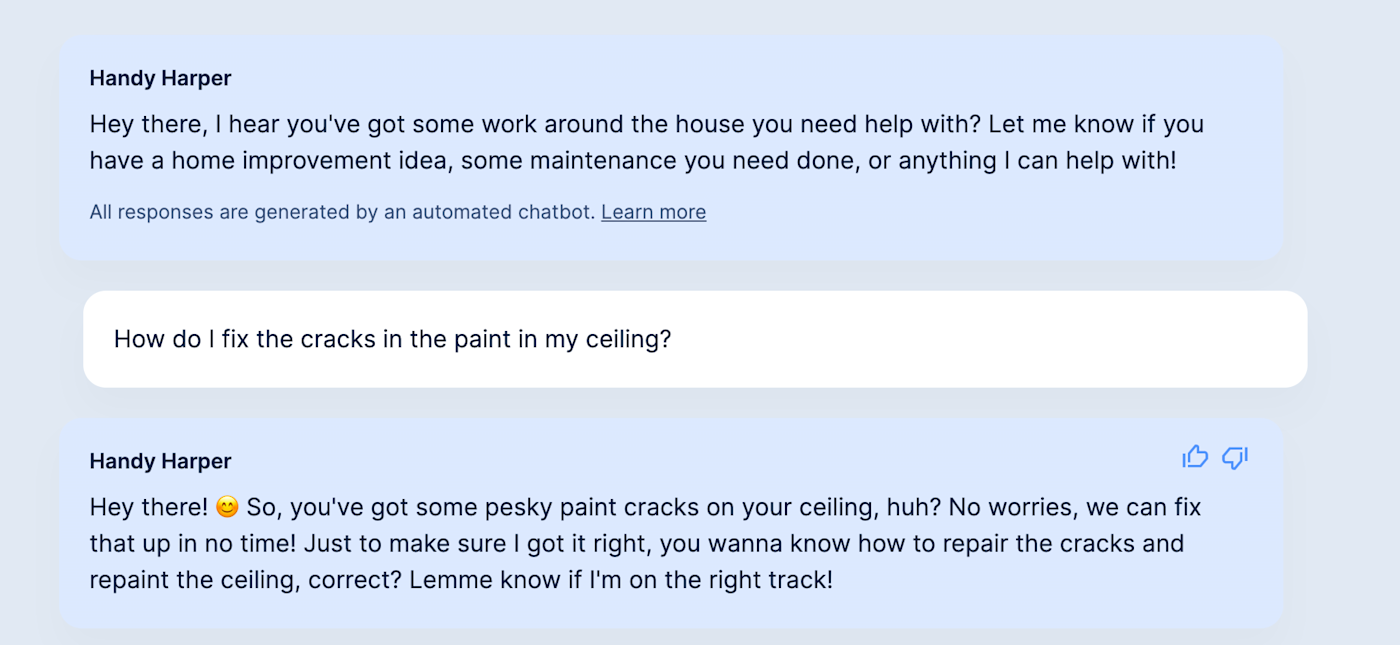
Here's another example of some "personality" bots that can help you with anything from birthday present ideas to work renovation projects:
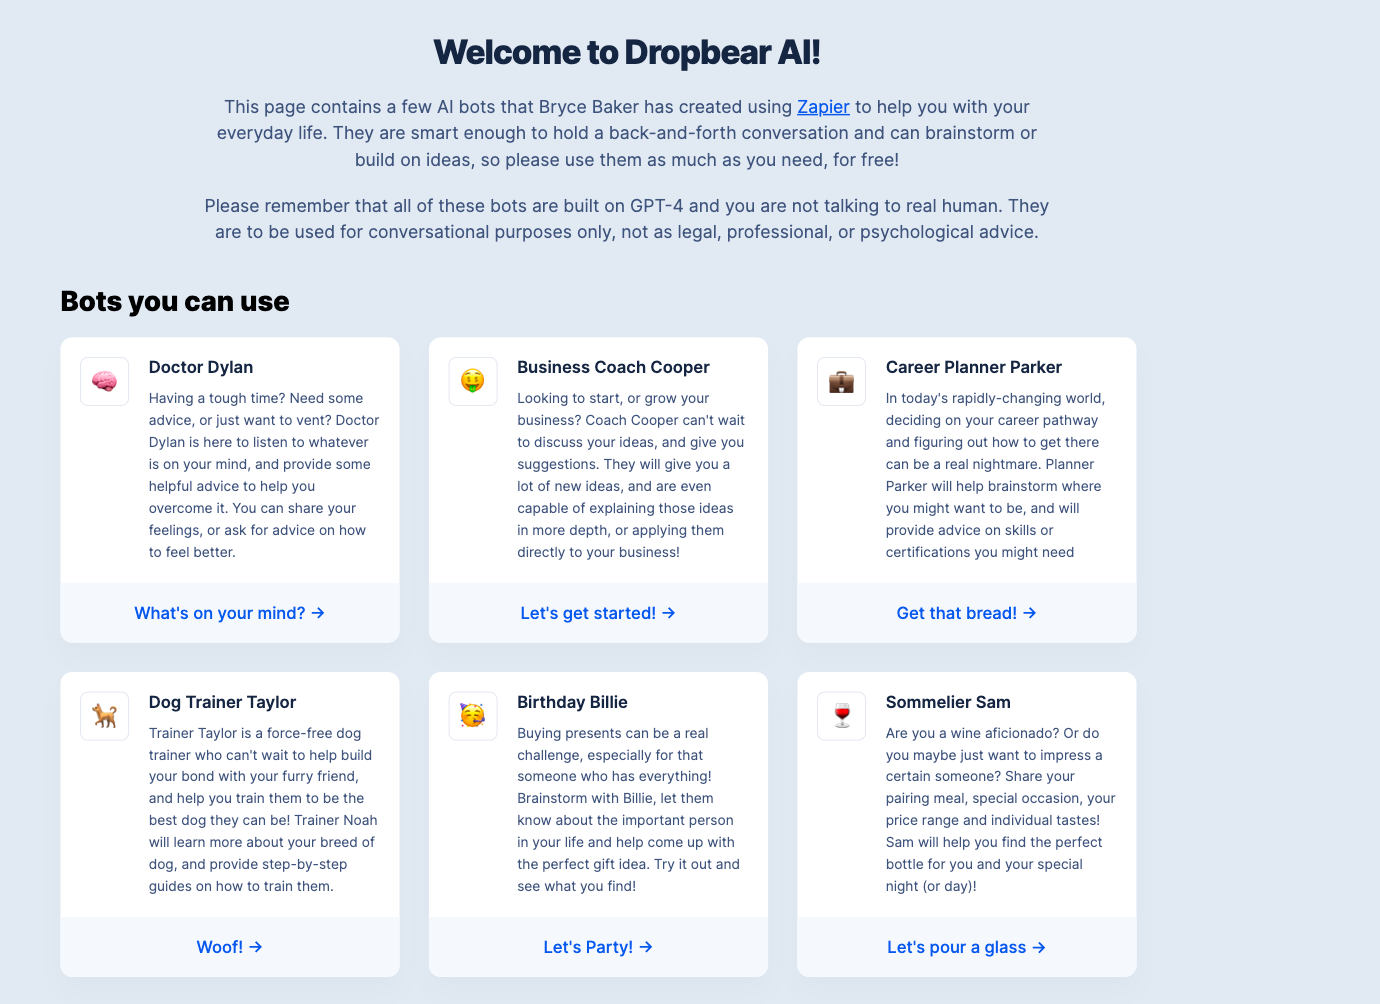
The possibilities are truly endless!
Bring the power of chatbots to your team
While we're still in the early days of using AI at work, these kinds of chatbots can be a powerful tool to help you improve everything from team communication to career growth.
With Interfaces and GPT-4 (or GPT-3.5), you can create your own custom chatbot in a matter of minutes, helping you streamline the way you work. So: have an idea for a chatbot that could benefit your team? Get experimenting!