If you're anything like me, you use Google Sheets to track all sorts of things. From articles that mention your company, to candidates you want to recruit, to that fun new green screen you want to expense for your home office.
Saving items in a Google Sheet is a convenient way to keep track of items you want to look into later or share with colleagues, but copying and pasting URLs and flipping back and forth between tabs can really slow you down.
With the
Zapier Chrome extension, you can add new rows to your Google Sheet with the click of a button while you're browsing the web. You don't even need to open the sheet itself.You'll need a Zapier account to use the workflows in this piece. If you don't have an account yet, it's free to get started.
How to set up the Zapier Chrome extension (in under 5 minutes)
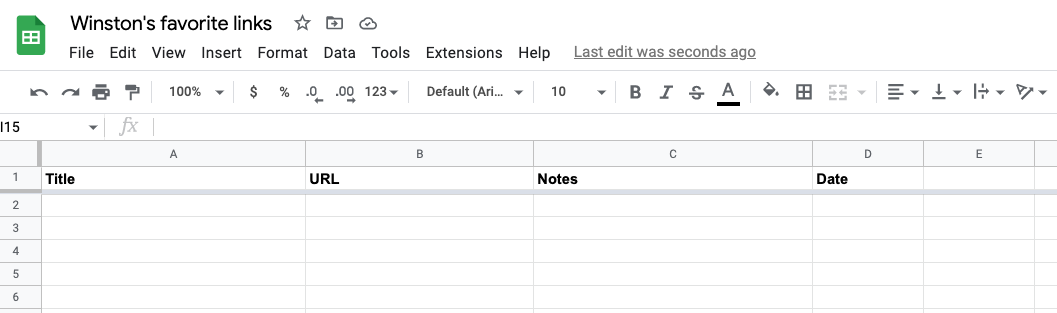
Set up your spreadsheet
If you don't already have a spreadsheet in mind, create a new one. Be sure to label your columns, so your Zap will work correctly later.
We recommend adding columns such as Title, URL, Saved by, and Date so you can track the website, who added it to the list, and when.
Install (and pin!) the Chrome extension
Then, head to the Chrome store, and install the Zapier Chrome extension. Once installed, we recommend "pinning" it, so it's easy to open whenever you need it.

Sign up or log in to your Zapier account
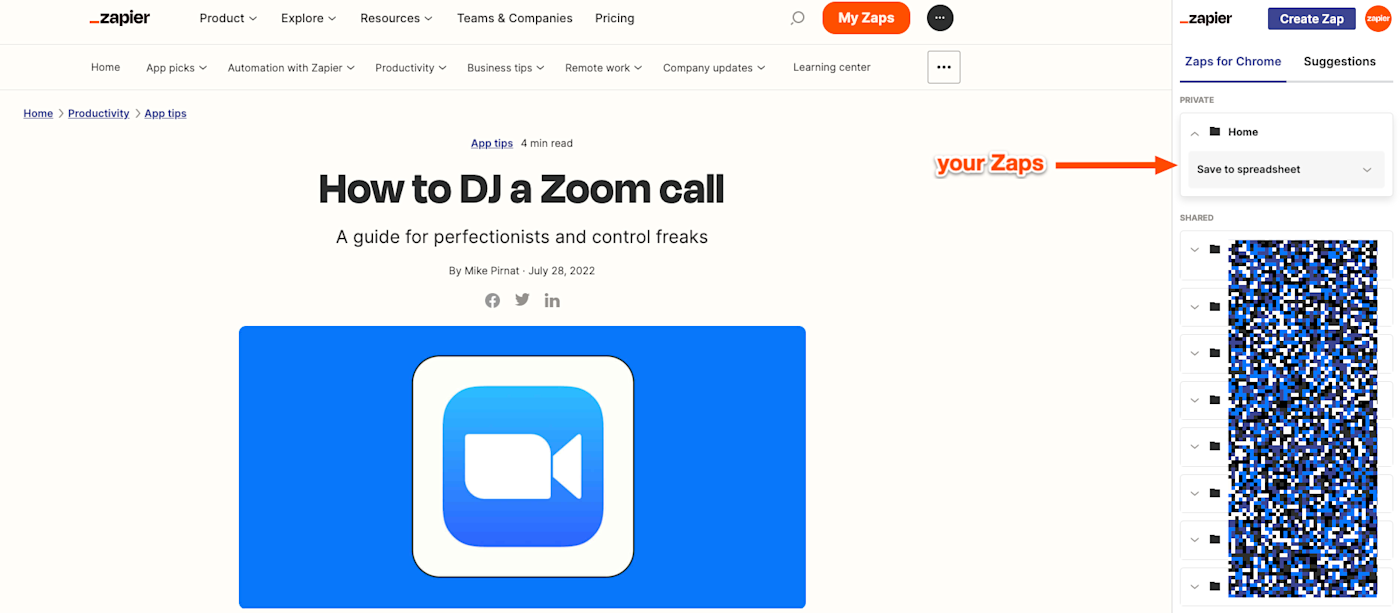
Once you've installed the Zapier Chrome Extension, log in to your Zapier account (or sign up) if you haven't yet. You'll see any Zaps you've created using the Chrome Extension. Under the Suggestions tab, you'll also find other suggestions for Zaps you can create based on your Zapier activity.
For this tutorial, we're creating a two-step Zap that only uses Google Sheets, so you'll be able to set this up for free.
Create a Zap to save URLs to your spreadsheet
There are two ways to set up the Zap. You can either click Create Zap in the upper left corner of the screen and set up the Zap from scratch, or click the button below to get started. We'll guide you through the setup process.
If you choose to create the Zap from scratch, you'll choose Zapier Chrome extension as the trigger app and New Push as the event.
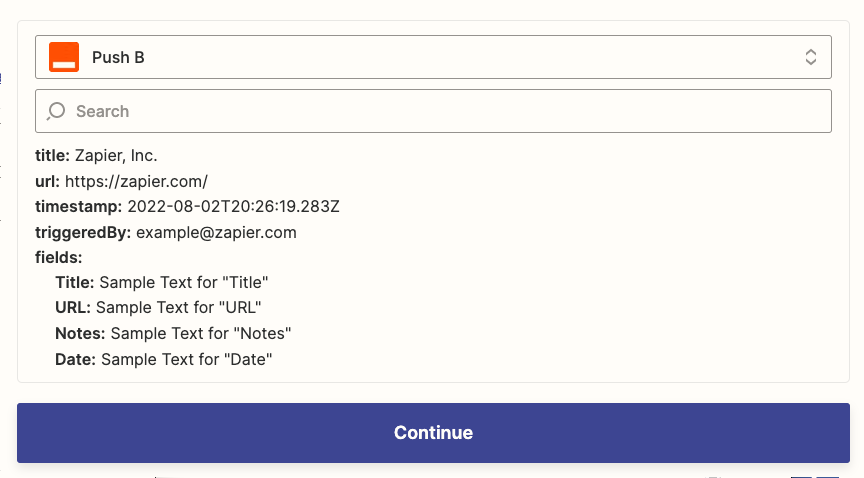
Next, add any extra input fields you'd like. Whenever you click on your Zap from the Chrome extension, it'll prompt you to populate these fields with extra information—if you so choose. (By default, Zapier will capture the tab title, the page URL, the Zapier account you triggered it from, and the timestamp.)

Once you've added any additional fields, click Continue and test your trigger. (You'll see sample information, which you'll use to set up the next step.)
Then, you'll set up the spreadsheet step of your Zap. If you're starting from scratch, choose Google Sheets (or your favorite spreadsheet app) as the app and Create Spreadsheet Row as the event.
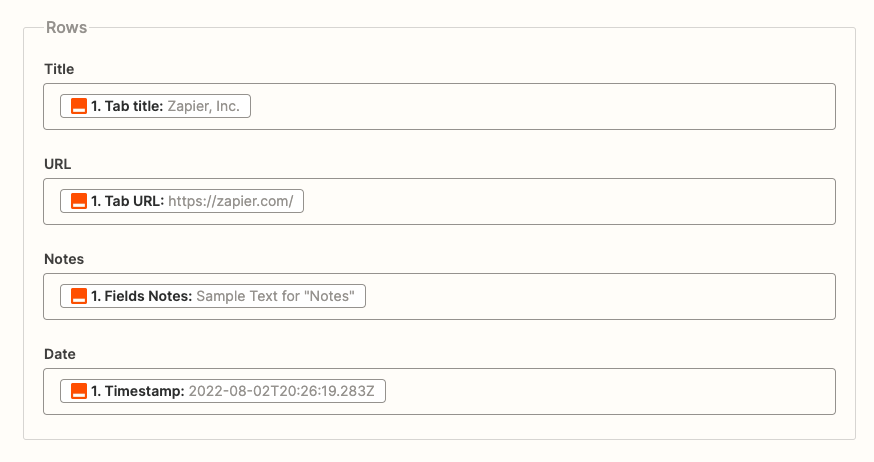
Once you've connected your Google account, you'll map the fields from the Zapier Chrome Extension to the corresponding columns in your spreadsheet.
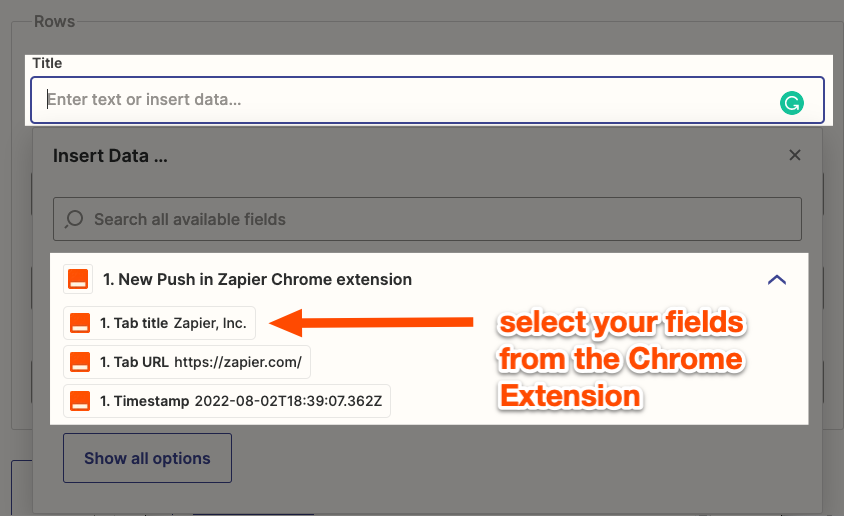
When you map a piece of data—such as a contact name—what you see in the editor is a placeholder. This placeholder data will only be used by your Zap when you test it. When your Zap is turned on, real data from your apps will be used when your Zap runs. We call these dynamic values.
Once the fields are mapped, it should look something like this:
Test it out
Once you've set up your action, be sure to test it! The test will create a row in your spreadsheet, so you'll be able to see how it looks.

Once you're satisfied, your Zap is ready to use. If things didn't come through as expected, confirm your fields are correctly mapped, and try again.
Bonus: Return a response in Chrome
If you'd like Zapier to return something back to you in the Chrome extension, you can do that.
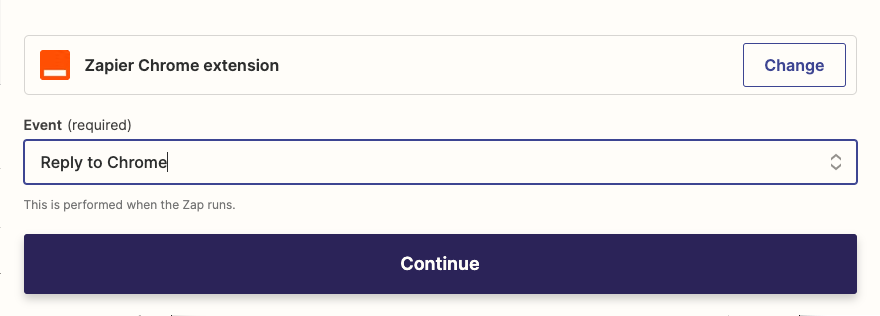
Add another step to your Zap, and select the Zapier Chrome extension as your app. For your event, select Reply to Chrome.
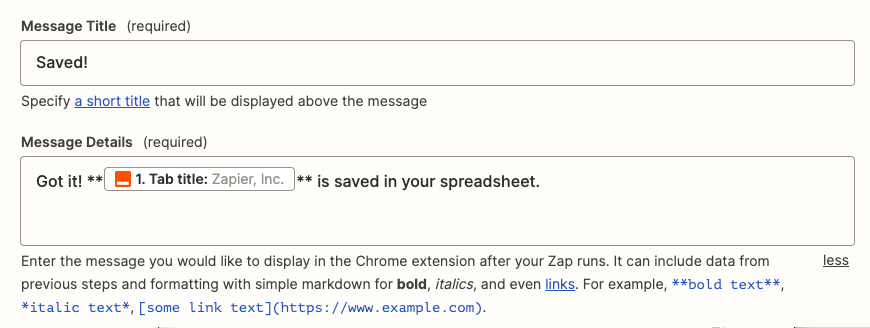
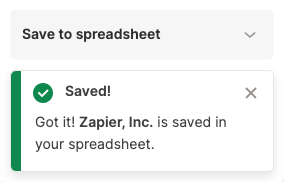
Then, you can customize what you want your response to say, such as a confirmation message. You can include fields from the previous steps in your response.
Tracking doesn't have to be a pain
Whether you track candidates, reading material, expenses, or competitor information, automation with Zapier makes it easy to stay on top of things. See what else you can do with the Zapier Chrome extension to save time.
New to Zapier? It's a tool that helps anyone connect apps and automate workflows—without any complicated code. Sign up for free.
Related reading:
This article was originally published in April 2021 and was most recently updated in August 2022 with contributions from Krystina Martinez.